The last time I seriously wrote a review for the old Doom Armory site was probably some time in 2008. At that point, I felt the "scene" for gameplay mods and weapon patches was beginning to stagnate, as was my interest in seeing more people make more mods. I believed that the community had hit its peak and probably would never go beyond the rather lofty standards set by mods like Zero Tolerance, Immoral Conduct (which at that point was nearly six years old) and my own Agent Diaz. It seemed that the weapon mod community had nowhere to go, no new frontiers to explore outside of "which old first-person shooter can I hack the resources out of next?"
It was soon after that I saw the unfortunate next step: the era of shuffle mods.
Community members were massively polarized by the release of a certain infamous mod called Aeons of Death. While it certainly wasn't the first gameplay mod to mash together so many resources from so many different places (we have Daniel's ZDGuns to thank for being the first), it certainly gained the most reputation...both good and bad. Its supporters love it because it can provide a literal new experience every time the game is started, simply because of how many unique monsters and weapons are available. Its detractors are far more vocal, decrying the gigantic arsenal and selection of monsters as being inconsistent at best, redundant and ugly at worst.
Aeons of Death provoked perhaps the harshest response possible when it was featured in Scuba Steve's 2010 edition of his annual Doomworld feature, The Cacowards. There, it earned the title "Worst Wad" - not for its quality of workmanship, but because of the precedent it set: that one could create an epic "masterpiece" merely from assembling bits and pieces of other games, and that it was entirely possible that said project would gain a number of fans because they recognized elements they liked from games they'd played years ago.
I don't disagree with that. In fact, in many cases, I believe that the popularity of these so-called "shuffle mods" is precisely the problem with gameplay mods these days. Too many people would rather just add more cool stuff to their arsenal and never pay any mind to how well it all fits together. I cite the far worse examples of Alando Guns X, 100GunsX, and Serious Skulltag, the latter of which actually got its creator banned from at least one forum for stealing content made by other users. I still see mods like this getting made, and in the worst cases, no credit whatsoever is being given to the people actually responsible for creating the content. (One author absolutely insisted that he'd made a weapon that I had coded years ago - his code was identical to mine, right down to a placeholder message.)
But shuffle mods aren't all that's been made over the past few years. The more experienced folks have been taking more of a "back to basics" route, especially those who entered CutmanMike's Mutator Contests. Maybe working within limits is the best way to inspire creativity - after all, without the restrictions on new graphics, we wouldn't have such unique ideas as Omega or Parkour, or (dare I self-promote?) Style Mod.
Maybe there's a dividing line here. The people who will carry this community forward from the hell that is resource-ripped shuffle mods...are the people who actually need no resources at all.

TUTORIAL: Altfires, Projectiles, and Accuracy
In the past couple of tutorials, you've learned the absolute basics and common knowledge stuff that you need to make a new weapon. Well, as tutorials go, I didn't really teach you everything; this tutorial will cover a number of other stuff that really doesn't warrant a separate article by itself.
Refire Inaccuracy
In How to Make Your First Basic Gun, we started off with a shotgun, which is always inaccurate due to the way Doom handles bullet spread. Things get slightly trickier when you're dealing with a gun that only fires one bullet at a time, like a pistol or machine gun. Let's look at an example fire state from a chaingun replacement:
If you were to try this code as-is in ZDoom, you would find that despite there being a large bullet spread in A_FireBullets, this chaingun is always perfectly accurate and could probably hit the broad side of a barn for as long as the trigger is held, every single time. Sometimes that's what you want, but in this case we obviously want there to be some spread. Well, the reason this code doesn't work as it stands is because of something called refire inaccuracy. This term isn't quite self-explanatory on its own, so let's break that up.
A refire refers to the action function A_Refire, which should go at the end of any automatic weapon's Fire state. Refire checks to see if the player still has the Fire button held down, and if so, it repeats the Fire state from the beginning. The inaccuracy part comes in when the Fire state is repeated. A_Refire does an extra thing when it sends the gun back to its Fire state: any A_FireBullets pointers that are set to have bullet spread and fire only one bullet will actually spread. In other words, the first shot is always perfectly accurate, but keeping the trigger held down will cause the bullets to start spreading.
Try adding an A_Refire to the end of this fire state:
And the weapon will only be inaccurate if you are not firing in short, controlled bursts.
There's an alternative way to get around this effect, too. If you don't want the first shot to always be accurate, for example if your weapon is a pistol or other single-shot weapon, tell A_FireBullets to fire -1 bullets instead of 1. Like this:
With that tiny little change, your gun will always be subject to bullet spread. (An extra little tip: if you want your pistol to not be automatic, i.e. if you want the player to have to press Fire once for every bullet, just add the flag +Weapon.NoAutoFire and remove the A_Refire pointer.)
Footnote: It should be noted again for clarity that if A_FireBullets is firing more than one bullet per shot, the shot will always be inaccurate, without the need for A_Refire.
Alternate Fire
A lot of modern games have multiple ways for you to fire your weapon. This neat little idea dates back as far as 1994's Star Wars: Dark Forces, and can add great variety to your arsenal. Adding an alternate fire mode to your weapon is actually really easy, since ZDoom has native support for it. There are only two things you need for an alternate fire: you need to specify an ammo type and usage for it, and you need to give it its own fire state.
First, the ammo type needs to be defined with these actor properties:
Then to define the alternate fire's firing state, you need only do what you'd do for a Fire state, except call said state AltFire. If we wanted to make the aforementioned chaingun fire faster as its alternate fire, we'd do something like this:
And there you have it.
Projectile Weapons
Projectiles don't work the same way as bullet attacks. The projectile must be defined as its own actor, with its own states, radius and height properties, etc. Here is an example projectile:
And in true tutorial fashion, we'll break that down bit by bit.
Projectiles do not need to inherit from anything. Unlike weapons, there is no parent class that needs to be used for proper functionality. So in this case, it's just ACTOR AwexomeRocket.
These lines determine the physics of your projectile. Radius and Height are especially important - they roughly correspond to the dimensions, in pixels, of the projectile's graphic, and will determine how "large" the projectile is in the game. This doesn't directly affect the visible size of the graphic, but rather, its bounding box; the larger the box, the easier it is for the projectile to hit a target. Try not to make the projectile too large, or your projectile will be prone to hitting walls in front of (or even just next to) the player. We also have Speed and Damage, which should be fairly obvious as to their functions.
A word on damage: Projectile damage is your damage number multiplied by 1d8 - this means that the number you specify for damage is the absolute minimum damage your projectile will do; the number is multiplied by a random number from one to eight, which is the "final" damage dealt. In other words, this rocket can do as much as 160 HP of damage in one hit. If you add the actor flag +StrifeDamage, projectile damage is instead 1d4, resulting in smaller numbers overall, but less deviation, so your rocket does damage more consistently (but you will need to increase the number to compensate). It is also possible to define your own damage formula from scratch by putting your damage number in parentheses. So if you wanted to recreate Strife's damage formula, your Damage property would look like this:
Refire Inaccuracy
In How to Make Your First Basic Gun, we started off with a shotgun, which is always inaccurate due to the way Doom handles bullet spread. Things get slightly trickier when you're dealing with a gun that only fires one bullet at a time, like a pistol or machine gun. Let's look at an example fire state from a chaingun replacement:
Fire:

CHGG A 2 BRIGHT A_FireBullets(5,5,1,7,"BulletPuff",1)

CHGG A 2

CHGG B 2 BRIGHT A_FireBullets(5,5,1,7,"BulletPuff",1)

CHGG B 2

Goto Ready
If you were to try this code as-is in ZDoom, you would find that despite there being a large bullet spread in A_FireBullets, this chaingun is always perfectly accurate and could probably hit the broad side of a barn for as long as the trigger is held, every single time. Sometimes that's what you want, but in this case we obviously want there to be some spread. Well, the reason this code doesn't work as it stands is because of something called refire inaccuracy. This term isn't quite self-explanatory on its own, so let's break that up.
A refire refers to the action function A_Refire, which should go at the end of any automatic weapon's Fire state. Refire checks to see if the player still has the Fire button held down, and if so, it repeats the Fire state from the beginning. The inaccuracy part comes in when the Fire state is repeated. A_Refire does an extra thing when it sends the gun back to its Fire state: any A_FireBullets pointers that are set to have bullet spread and fire only one bullet will actually spread. In other words, the first shot is always perfectly accurate, but keeping the trigger held down will cause the bullets to start spreading.
Try adding an A_Refire to the end of this fire state:
Fire:

CHGG A 2 BRIGHT A_FireBullets(5,5,1,7,"BulletPuff",1)

CHGG A 2

CHGG B 2 BRIGHT A_FireBullets(5,5,1,7,"BulletPuff",1)

CHGG B 2

CHGG A 1 A_Refire

Goto Ready
And the weapon will only be inaccurate if you are not firing in short, controlled bursts.
There's an alternative way to get around this effect, too. If you don't want the first shot to always be accurate, for example if your weapon is a pistol or other single-shot weapon, tell A_FireBullets to fire -1 bullets instead of 1. Like this:
A_FireBullets(5,5,-1,7,"BulletPuff",1)With that tiny little change, your gun will always be subject to bullet spread. (An extra little tip: if you want your pistol to not be automatic, i.e. if you want the player to have to press Fire once for every bullet, just add the flag +Weapon.NoAutoFire and remove the A_Refire pointer.)
Footnote: It should be noted again for clarity that if A_FireBullets is firing more than one bullet per shot, the shot will always be inaccurate, without the need for A_Refire.
Alternate Fire
A lot of modern games have multiple ways for you to fire your weapon. This neat little idea dates back as far as 1994's Star Wars: Dark Forces, and can add great variety to your arsenal. Adding an alternate fire mode to your weapon is actually really easy, since ZDoom has native support for it. There are only two things you need for an alternate fire: you need to specify an ammo type and usage for it, and you need to give it its own fire state.
First, the ammo type needs to be defined with these actor properties:
Weapon.AmmoType2 "Cell"

Weapon.AmmoUse2 10

Weapon.AmmoGive2 20
Then to define the alternate fire's firing state, you need only do what you'd do for a Fire state, except call said state AltFire. If we wanted to make the aforementioned chaingun fire faster as its alternate fire, we'd do something like this:
AltFire:

CHGG A 1 BRIGHT A_FireBullets(8,8,1,7,"BulletPuff",1)

CHGG A 1

CHGG B 1 BRIGHT A_FireBullets(8,8,1,7,"BulletPuff",1)

CHGG B 1

CHGG A 1 A_Refire

Goto Ready
And there you have it.
Projectile Weapons
Projectiles don't work the same way as bullet attacks. The projectile must be defined as its own actor, with its own states, radius and height properties, etc. Here is an example projectile:
actor AwexomeRocket

{

Radius 11

Height 8

Speed 20

Damage 20

Projectile

SeeSound "weapons/rocklf"

DeathSound "weapons/rocklx"

Obituary "$OB_MPROCKET" // "%o rode %k's rocket."

States

{

Spawn:

MISL A 1 bright

loop

Death:

MISL B 8 bright A_Explode(128,128)

MISL C 6 bright

MISL D 4 bright

stop

}

}
And in true tutorial fashion, we'll break that down bit by bit.
Projectiles do not need to inherit from anything. Unlike weapons, there is no parent class that needs to be used for proper functionality. So in this case, it's just ACTOR AwexomeRocket.
  Radius 11

Height 8

Speed 20

Damage 20
These lines determine the physics of your projectile. Radius and Height are especially important - they roughly correspond to the dimensions, in pixels, of the projectile's graphic, and will determine how "large" the projectile is in the game. This doesn't directly affect the visible size of the graphic, but rather, its bounding box; the larger the box, the easier it is for the projectile to hit a target. Try not to make the projectile too large, or your projectile will be prone to hitting walls in front of (or even just next to) the player. We also have Speed and Damage, which should be fairly obvious as to their functions.
A word on damage: Projectile damage is your damage number multiplied by 1d8 - this means that the number you specify for damage is the absolute minimum damage your projectile will do; the number is multiplied by a random number from one to eight, which is the "final" damage dealt. In other words, this rocket can do as much as 160 HP of damage in one hit. If you add the actor flag +StrifeDamage, projectile damage is instead 1d4, resulting in smaller numbers overall, but less deviation, so your rocket does damage more consistently (but you will need to increase the number to compensate). It is also possible to define your own damage formula from scratch by putting your damage number in parentheses. So if you wanted to recreate Strife's damage formula, your Damage property would look like this:
Damage (20*random(1,4))


You can also use parentheses to ensure that a projectile always does the same damage every time:


Damage (40)


Up next is the single most important part of a projectile actor:

Projectile

This is a very special actor flag. This tells ZDoom to treat this actor as a projectile instead of a monster or decoration. In reality, it actually sets a few flags automatically, such as +NoGravity, +Dropoff, +Missile, and others, so that the projectile does not do dumb things like refuse to go over long drops or crash into invisible lines. After setting Projectile, you can actually negate flags to add special effects. For example, if you wanted this rocket to be a grenade instead, you would follow Projectile with this flag:

-NoGravity

Which would then make the rocket drop to the ground when fired. Moving on...


  SeeSound "weapons/rocklf"

DeathSound "weapons/rocklx"

Obituary "%o is hit in the groin by %k's rocket."

These are fairly important as well. SeeSound is the sound your projectile will make when it is fired. Unlike with bullet-based weapons, a projectile weapon's AttackSound is not used when missiles are fired; the projectile's SeeSound is used instead. DeathSound is the sound your projectile makes when it explodes. The Obituary is what the game displays in deathmatch when another player is killed by this projectile. In game, %o will be replaced with the victim's name, and %k is replaced with the killer's name. This ZDoom wiki page contains other tags you can use, including markers for a player's gender.


 States

{

Spawn:

MISL A 1 bright

loop

Death:

MISL B 8 bright A_Explode(128,128)

MISL C 6 bright

MISL D 4 bright

stop

}

}

And the last bit, the States. Projectiles' states are simple; all you need is a Spawn state (the animation of your projectile in flight) and a Death state (the explosion animation). You'll probably see a function here you may not recognize: A_Explode. You can read all about it at this wiki page; there are some really neat extra effects you can pull off with it, but the short and simple of it is that A_Explode is what you want if you want your projectile to hurt a big group of monsters.


So now that we've got a projectile defined, we just need something to fire it. For a weapon, we'll accomplish this with the A_FireCustomMissile function. Observe:

  Fire:

TRIF A 5 Bright A_FireCustomMissile("AwexomeRocket")

TRIF B 5 Bright

TRIG A 10

TRIG B 0 A_Refire

Goto Ready

Ordinarily, all A_FireCustomMissile needs for an argument is the actor name of your projectile. If you don't want it to cost ammo every time it is fired, that is the third argument, following the Angle (further details are in the wiki page for A_FireCustomMissile). So a simple projectile attack consists entirely of the missile's name, since the default parameters will launch your projectile straight forward, and will cost the specified amount of ammo (that's in Weapon.AmmoType1, by the way, or Weapon.AmmoType2 if it's for the altfire) every time it is fired. Simple enough, eh? If for some reason you don't want it to cost ammo, it'd look more like this:


A_FireCustomMissile("AwexomeRocket", 0, 0)


Because you can't just throw the argument in there willy-nilly. Arguments go in a specific order, and if you want to change one of the "later" ones, you need to specify all of the arguments that come before it. In this case, a zero is passed to the second argument, Angle, which is already the default, so that we can then pass a zero to the Flags argument to make it not take ammo. Again, the wiki page for A_FireCustomMissile will be of much help if you want to do more with this function.


If you want to see all the other stuff you can pull off with functions like these, just have a look at the Action Functions page at ZDoom Wiki. The Wiki is your friend!
TUTORIAL: New Sprites and How They Work For Guns
PLATFORM: ZDoom 2.5.0 or later
PROGRAMS NEEDED: Slade 3.0 or later, GraphicsGale and Irfanview or equivalent graphics program
The previous tutorial explained the absolute basics of working with the SLADE 3.0 editor and the essentials of using Decorate to make weapons. In this tutorial, we're going to add some concepts to the mix that you will probably want if you're going to make anything more elaborate than a quick shotgun, such as creating new sprites in GraphicsGale or your favorite paint program, making new sounds in Audacity or any audio editor, and how to define all these new things for use in your Decorate code.
First, we'll want graphics, so go ahead and install and run GraphicsGale (the shareware edition should be fine for our purposes; the full registered version adds the ability to save in GIF and Windows Icon formats, which probably won't be necessary for us). Let's make a simple assault rifle.
Create a new image. For its size, remember that native Doom graphics are designed for a screen resolution of 320x200 pixels, so unless you want to mess with high res graphics (which are beyond the scope of this tutorial), you'll want something smaller than that. For this example, I created a 160x160 image. Leave it at 24bpp for color settings.
The actual drawing of weapon graphics is also beyond the scope of this tutorial - there are countless great tutorials by the likes of Eriance, Nmn and Scuba Steve about this sort of thing. Since we're not learning how to draw here, though, let's just throw something together.
Now that we've got a picture, we need to save it properly for Doom. GraphicsGale's saving of transparency isn't terribly intuitive so you'll want another free program, Irfanview, to help out here. In GraphicsGale, paint the background of your graphic in a color that will not be used anywhere else on your gun. We'll use hot pink.
Once you've saved your image (preferably as a PNG!), open it in Irfanview. We need to optimize this to be used in Doom. Ports like GZDoom do support true-color PNGs as weapon graphics, but such guns will probably look dumb in software-mode ports like ZDoom or Skulltag, so go Image -> Decrease Color Depth... and select 256 colors (8-bit). You'll probably want to enable dithering to make it look less dumb, but that's really a matter of taste. Hit OK when you're satisfied, then go File -> Save (original folder), name it something you'll remember, and make sure Irfanview is saving the graphic as a PNG. If it's not already on, check the "Show options dialog" check box at the bottom of the window, and look at the PNG settings to the right. Turn on the "Save Transparent Color" checkbox, then click Save.
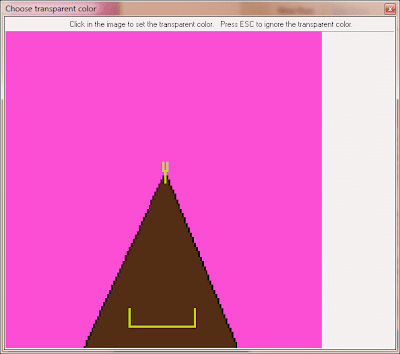
The next window that appears is important - it shows an enlarged version of your picture. What it wants you to do here is click on any color to set it as the transparent color. In this case, click on any of the stuff that we colored hot pink earlier. When you reopen the image in any image editor, the hot pink will still show up, but most viewers (and most importantly, Doom) will treat it as if it's invisible.
Rant Alert: Contrary to what many preexisting tutorials and older editing programs may try to tell you, Color 247 is not transparent! Cyan is not transparent! Old editors such as XWE or WinTex will automatically treat the color at palette index #247 as transparency, stripping any pixels of that color from the image. The thing is, in Doom, index 247 is actually a black color and is usable by graphics. XWE and WinTex assume it's transparent, however, which causes problems with some graphics. SLADE does no such thing - it takes the image itself purely at face value, nothing more, nothing less. If anybody has told you to use color 247 or cyan to make things transparent, ignore them. We're here to teach you the right way to do things. Rant alert over. You may now resume learning.
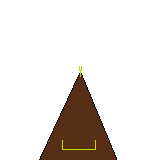
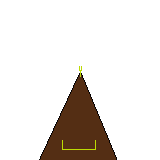
If you followed the earlier instructions correctly, your new gun should be correctly saved, properly transparent, and probably will look a bit like this:
Now that we've got a graphic, let's get it into our mod.
Fire up SLADE, create a new Zip archive. From the toolbar, click on New Directory (the closed-folder button on the second section of the toolbar). This folder will be called sprites. Double-click on the new folder in the entries list to open it. Now we need to import the sprite. From the menu bar, click Archive -> Import Files and find your saved image. There are a couple things we need to do here before it'll be ready for the game, though. First, we need to name it according to Doom's sprite naming system. We kind of went over this in the previous tutorial ("How To Make Your First Basic Gun"), but let's go over it again now that it's more important.
Doom's sprite graphics have a specific 8-character naming scheme. Your average sprite is probably named something like SHOTA0. The first four characters, SHOT, can be pretty much anything (as long as it's not being used already). The fifth character (A in this case) is the index, which can be a letter from A to Z. The sixth character is the angle, which in this case is a zero, as this graphic should be displayed for all facing directions. For sprites that need to be shown facing specific directions, the numbers 1 through 8 can be used, where 1 faces toward the camera, 3 faces directly left, 5 faces away, and 7 faces to the right, with 2, 4, 6, and 8 being in-between angles for diagonal directions. ZDoom and its derivatives actually support 9 through F to make 16-angled sprites, but we won't bother getting into that now.
I didn't mention what the seventh and eighth characters were for in the last tutorial - these are for sprites that are placed in maps, such as monsters and decorations. Most artists don't bother making sprites for all eight angles of a monster, as this would in most cases be a colossal waste of time and also increase the size of the mod a bit. That's why Doom has built-in functionality to mirror sprites to "fill in the blanks." An artist can make only the sprites for the left-facing angles (2, 3, and 4) and leave it to Doom to mirror them for angles 5, 6, and 7. This is done by adding two extra characters to the sprite name. For example, POSSA2D8 is the sprite POSS, angle 2 of index A, and the extra two characters indicate that this can also be used for angle 8 of index D. This was quite a bit off-topic, though, as we're not quite dealing with monsters yet.
Go ahead and name your sprite TSTGA0.png (test gun, index A, angle 0 - the .png extension is retained because this is a Zip archive). When you're done, click on the "Go Up" button (the folder with an up arrow, just above the Entries list) to get back to the root of your project.
Create a new entry and call it Decorate.txt. Write up a new weapon like your old SuperAutoShotgun (feel free to copy-paste the code from the old gun and modify it to suit), except replace all references to SHTG with TSTG, and all of the indexes to A, since we only have the one frame. Save your archive somewhere (remember, give it a .PK3 extension to make it more clear that this is to be run with ZDoom, not extracted) and test it. Your awesome new graphic is showing up in game, but it's stuck on the top left of the screen. Not pretty. When you're satisfied with it, quit the game and come back to SLADE. We've got some fixing to do.
Go back into the Sprites folder and click once on TSTGA0.png. It should appear in the main viewer window. Zoom in if you need to, using the slider on top. Under the Type drop box, select HUD to show the screen guides. Here's one of the important parts of adding new sprites to Doom: alignment.
When you add a new graphic to your project, Doom doesn't automatically know where to place it on screen. Some weapon graphics aren't perfectly symmetrical (like the Shotgun, which has part of a hand sticking off of it). It's for this reason that we can align sprites - in other words, determine where exactly they appear in relation to the screen (or for monsters, in relation to the floor). SLADE makes things pretty easy for you: just click and drag your image around on the wireframe guides. The outer border represents the edge of the screen, the middle horizontal line represents the top of the Doom status bar, and the middle vertical line represents the center of the screen. You'll want to align the "tip" of your weapon with the vertical line, and make sure that the bottom edge of your graphic is no higher than the status bar, so it doesn't appear "disembodied" from the bottom of the screen in game. It should look a bit like this:
Save the image (the "Save Changes" button on the bottom right of the window), save the archive, and then test it in ZDoom. It should now align perfectly to the crosshair.
PROGRAMS NEEDED: Slade 3.0 or later, GraphicsGale and Irfanview or equivalent graphics program
The previous tutorial explained the absolute basics of working with the SLADE 3.0 editor and the essentials of using Decorate to make weapons. In this tutorial, we're going to add some concepts to the mix that you will probably want if you're going to make anything more elaborate than a quick shotgun, such as creating new sprites in GraphicsGale or your favorite paint program, making new sounds in Audacity or any audio editor, and how to define all these new things for use in your Decorate code.
First, we'll want graphics, so go ahead and install and run GraphicsGale (the shareware edition should be fine for our purposes; the full registered version adds the ability to save in GIF and Windows Icon formats, which probably won't be necessary for us). Let's make a simple assault rifle.
Create a new image. For its size, remember that native Doom graphics are designed for a screen resolution of 320x200 pixels, so unless you want to mess with high res graphics (which are beyond the scope of this tutorial), you'll want something smaller than that. For this example, I created a 160x160 image. Leave it at 24bpp for color settings.
The actual drawing of weapon graphics is also beyond the scope of this tutorial - there are countless great tutorials by the likes of Eriance, Nmn and Scuba Steve about this sort of thing. Since we're not learning how to draw here, though, let's just throw something together.

Lovely.
Now that we've got a picture, we need to save it properly for Doom. GraphicsGale's saving of transparency isn't terribly intuitive so you'll want another free program, Irfanview, to help out here. In GraphicsGale, paint the background of your graphic in a color that will not be used anywhere else on your gun. We'll use hot pink.

Aww yeah.
Once you've saved your image (preferably as a PNG!), open it in Irfanview. We need to optimize this to be used in Doom. Ports like GZDoom do support true-color PNGs as weapon graphics, but such guns will probably look dumb in software-mode ports like ZDoom or Skulltag, so go Image -> Decrease Color Depth... and select 256 colors (8-bit). You'll probably want to enable dithering to make it look less dumb, but that's really a matter of taste. Hit OK when you're satisfied, then go File -> Save (original folder), name it something you'll remember, and make sure Irfanview is saving the graphic as a PNG. If it's not already on, check the "Show options dialog" check box at the bottom of the window, and look at the PNG settings to the right. Turn on the "Save Transparent Color" checkbox, then click Save.
The next window that appears is important - it shows an enlarged version of your picture. What it wants you to do here is click on any color to set it as the transparent color. In this case, click on any of the stuff that we colored hot pink earlier. When you reopen the image in any image editor, the hot pink will still show up, but most viewers (and most importantly, Doom) will treat it as if it's invisible.
Rant Alert: Contrary to what many preexisting tutorials and older editing programs may try to tell you, Color 247 is not transparent! Cyan is not transparent! Old editors such as XWE or WinTex will automatically treat the color at palette index #247 as transparency, stripping any pixels of that color from the image. The thing is, in Doom, index 247 is actually a black color and is usable by graphics. XWE and WinTex assume it's transparent, however, which causes problems with some graphics. SLADE does no such thing - it takes the image itself purely at face value, nothing more, nothing less. If anybody has told you to use color 247 or cyan to make things transparent, ignore them. We're here to teach you the right way to do things. Rant alert over. You may now resume learning.
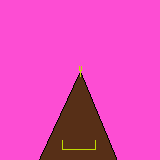
If you followed the earlier instructions correctly, your new gun should be correctly saved, properly transparent, and probably will look a bit like this:

Now that we've got a graphic, let's get it into our mod.
Fire up SLADE, create a new Zip archive. From the toolbar, click on New Directory (the closed-folder button on the second section of the toolbar). This folder will be called sprites. Double-click on the new folder in the entries list to open it. Now we need to import the sprite. From the menu bar, click Archive -> Import Files and find your saved image. There are a couple things we need to do here before it'll be ready for the game, though. First, we need to name it according to Doom's sprite naming system. We kind of went over this in the previous tutorial ("How To Make Your First Basic Gun"), but let's go over it again now that it's more important.
Doom's sprite graphics have a specific 8-character naming scheme. Your average sprite is probably named something like SHOTA0. The first four characters, SHOT, can be pretty much anything (as long as it's not being used already). The fifth character (A in this case) is the index, which can be a letter from A to Z. The sixth character is the angle, which in this case is a zero, as this graphic should be displayed for all facing directions. For sprites that need to be shown facing specific directions, the numbers 1 through 8 can be used, where 1 faces toward the camera, 3 faces directly left, 5 faces away, and 7 faces to the right, with 2, 4, 6, and 8 being in-between angles for diagonal directions. ZDoom and its derivatives actually support 9 through F to make 16-angled sprites, but we won't bother getting into that now.
I didn't mention what the seventh and eighth characters were for in the last tutorial - these are for sprites that are placed in maps, such as monsters and decorations. Most artists don't bother making sprites for all eight angles of a monster, as this would in most cases be a colossal waste of time and also increase the size of the mod a bit. That's why Doom has built-in functionality to mirror sprites to "fill in the blanks." An artist can make only the sprites for the left-facing angles (2, 3, and 4) and leave it to Doom to mirror them for angles 5, 6, and 7. This is done by adding two extra characters to the sprite name. For example, POSSA2D8 is the sprite POSS, angle 2 of index A, and the extra two characters indicate that this can also be used for angle 8 of index D. This was quite a bit off-topic, though, as we're not quite dealing with monsters yet.
Go ahead and name your sprite TSTGA0.png (test gun, index A, angle 0 - the .png extension is retained because this is a Zip archive). When you're done, click on the "Go Up" button (the folder with an up arrow, just above the Entries list) to get back to the root of your project.
Create a new entry and call it Decorate.txt. Write up a new weapon like your old SuperAutoShotgun (feel free to copy-paste the code from the old gun and modify it to suit), except replace all references to SHTG with TSTG, and all of the indexes to A, since we only have the one frame. Save your archive somewhere (remember, give it a .PK3 extension to make it more clear that this is to be run with ZDoom, not extracted) and test it. Your awesome new graphic is showing up in game, but it's stuck on the top left of the screen. Not pretty. When you're satisfied with it, quit the game and come back to SLADE. We've got some fixing to do.
Go back into the Sprites folder and click once on TSTGA0.png. It should appear in the main viewer window. Zoom in if you need to, using the slider on top. Under the Type drop box, select HUD to show the screen guides. Here's one of the important parts of adding new sprites to Doom: alignment.
When you add a new graphic to your project, Doom doesn't automatically know where to place it on screen. Some weapon graphics aren't perfectly symmetrical (like the Shotgun, which has part of a hand sticking off of it). It's for this reason that we can align sprites - in other words, determine where exactly they appear in relation to the screen (or for monsters, in relation to the floor). SLADE makes things pretty easy for you: just click and drag your image around on the wireframe guides. The outer border represents the edge of the screen, the middle horizontal line represents the top of the Doom status bar, and the middle vertical line represents the center of the screen. You'll want to align the "tip" of your weapon with the vertical line, and make sure that the bottom edge of your graphic is no higher than the status bar, so it doesn't appear "disembodied" from the bottom of the screen in game. It should look a bit like this:
Save the image (the "Save Changes" button on the bottom right of the window), save the archive, and then test it in ZDoom. It should now align perfectly to the crosshair.
Style Mod - Retrospective
In mid-2010, CutmanMike held a friendly competition at the ZDoom Forums: the second Doom Mutator Contest. The objective of said contest was to make a mod - however complex - that in its base format, includes no additional graphics, sounds, or maps. The only permitted lumps are ZDoom's own code lumps (Decorate, ACS, Textures, etc). Having missed the contest the first time it came around in 2009, I decided it was time I get in on the action, but I lacked inspiration until I came upon Xaser's entry in said contest, "Parkour". Xaser's mod creatively manipulated the default Doom weapon graphics (mainly simple things like mirroring the pistol sprite for dual-wielding) using the Textures lump, ZDoom's more powerful text-based replacement for the antiquated and error-prone TEXTURE1 and TEXTURE2 lumps from vanilla Doom.
Well, Xaser might have added reloading, dual-wielding and wall-jumping to his mod, I told myself, but he didn't bring things to their next logical step: doing ridiculous things with Textures. Thus, Style Mod was (re)born.
The "original" Style Mod was a conceptual test for me. I had one and a half weapons imported (I was lacking for graphics for stylish weapons, and at the time I didn't feel like finishing the "default" weapon, the Mauser pistol), but the concept was realized. That concept was that all weapons have unlimited ammo, but their alternate fires cost Style Points, something that I somewhat borrowed from the 2002 FPS game, Dead Man's Hand (except DMH's guns still used ammo). When I was hurting for ideas for my Mutator, I dove into my unfinished mods and elected to borrow the concept from that unfinished "ww-style!.wad" that just happened to be sitting there.
Style Mod's six weapons all have unlimited ammo. Even the "ultimate" weapon, the Swarmer Launcher, costs no ammo to fire. Having all six weapons never run out of ammo was difficult to balance - I'm so used to dealing with Doom's default ammo pickups that this was a new thing for me. Most of the balance here comes from earlier lessons: damage from "free" weapons (stuff you get at the start of the game) was less than damage from stuff acquired later, and damage from infinite-ammo weapons was also less. Initial tests, though, proved this didn't quite work for a concept where all weapons could fire endlessly. So what I did was set them roughly to the same damage Doom's equivalent weapons would do, but altered their behavior to make each weapon unique.
And each weapon truly is unique. The new Pistol fires as fast as you can click the trigger (the only weapon that is not automatic) and its alternate fire doesn't do any additional damage but does spew bullets in bursts, for a somewhat quicker fire rate. Initially, I had the pistol even firing at the same rate as Doom's, just with a smoother animation due to my heavy abuse of the Offset tags, but I decided it was more fun (and made the pistol more useful) if I made it a true semi-automatic. Initially, I'd used Textures to mirror the pistol sprites to be right-handed, but I decided it was more "stylish" if Doomguy were deliberately using his off-hand to fire the pistol. To quote a certain Commando from a certain popular strategy game series, "Ha, that was left-handed!"
The Tech Laser does about the same damage as the pistol, but is a projectile weapon (thus its shots take time to arrive) and it is fully automatic (but not particularly fast). What makes it stand out, however, is its ability to fire in five-shot waves, making it function roughly as the original shotgun does, but with the twist of its quick firing rate and a wider angle to encourage the player to get closer and letting loose with it. The Tech Laser was designed to be the go-to weapon for lovers of shotgun-like (but not necessarily actual shotgun) weapons, such as Heretic's crossbow. This sprite seems to have impressed the most people; I basically managed to make an entirely new graphic by merely using Textures to hack off the left and right edges of the BFG 9000 and stitch them together, and only later adding a carrying hand to it (Doom 2's super shotgun reload frame). The sound, used in Doom 2 for the secret Commander Keen's pain sound, always used to bug me in the base game - I played Commander Keen when I was 4, see, and that sound had since been burned into my mind as the sound Keen's ray gun made when fired. So I brought it back to its roots by setting it as the Tech Laser's firing sound. (This has the amusing side effect of making the Tech Laser scream in pain if you play TVR!.wad with it, and making it speak cartoon language if you use Freedoom.)
The Dual Neutron Disruptor, an idea I borrowed from Apogee's cult-classic FPS, Blake Stone, is the mod's "chaingun." It is a hitscan weapon with a relatively fast rate of fire, tight accuracy, and the additional aesthetic benefit of a neat plasma spark effect. Its alternate fire does away with the alternating barrels and just fires both barrels at once - that ended up being kind of an underwhelming alternate fire, so I doubled its damage as well. The DND is the second cheapest thing you can do with your Style Points. The graphic for this was probably the simplest in concept, but has probably the most amount of frames, due to my perfectionism and wanting to make the barrels move smoothly.
What I suspect will be the fan favorite is the Triple Shotgun. Doom mods always seem to do quad shotguns (even Parkour is no exception; it just splits the quad into a pair of doubles), so I decided to fill the perceived gap by introducing the triple shotgun. It can fire three shots before reloading, or with the alt fire, blow all three barrels at once. Its severe lack of accuracy pretty much relegates this to the realm of "melee weapon." Fun fact: I wasn't able to make the single shotgun barrel mix well with the super shotgun's, so I started looking through Doom2.wad's resources to get inspiration - I eventually borrowed a single column of pixels from one texture to use as "borders" for the top barrel.
The Overkill Cannon was the last weapon I built for Style Mod, and certainly the one that seems to see the least usage due to how extremely specialized it is. It fires two miniguns, spraying untold amounts of ammo down-range over a huge arc, with the sole drawback being that the player must stand completely still while it is firing (in the text file, I argued that it would be a physical impossibility to run while firing it anyway). The alternate fire makes it fire even faster, at the cost of draining your entire Style Points pool over the course of five seconds. I honestly find the concept of a weapon designed purely to stun-lock enemies with pure bullet spam to be hilarious, so I personally use the weapon at any opportunity I find (particularly against Arch-Viles). Even despite its tendency to stun-lock anything that crosses its path, I still don't advise using it against the Cyberdemon, since if it manages to break free from the stun long enough to even launch a single rocket at you, it could be the end for you.
And finally we have the Swarmer Launcher, effectively the game's ultimate weapon (since I completely disabled the BFG, making some crack in the readme file about it being "Schroedinger's BFG"). Primary fire launches a spread of five rockets that intelligently seek out the nearest target within their own visual range. This is thanks to ZDoom's SMF_PRECISE homing method, which unfortunately meant at the time that users had to update to an SVN build of ZDoom (which confused a lot of people who refused to run "beta" software, and one unfortunate person that wanted to run it in Skulltag). Alternate fire is my favorite part, though: what they of the TVTropes community would refer to as a Macross Missile Massacre. Holding the alt-fire button causes your Style Points to drain. When the trigger is released, the Swarmer Launcher will fire as many missiles as the Style Points you charged it with, up to 100. In very wide-open maps, it is often fun to charge this to maximum and release the payload into the air, causing the missiles to rain down on the group from above, in what I can only effectively call a reenactment of the Persian archer division from "300."
Probably my proudest achievement with Style Mod is also the most subtle - notice the item that replaces the Chainsaw. It's a rather pixelated pair of sunglasses. Those weren't in any of the Doom IWAD files. So how'd I do it? Again, there are NO new graphic resources in ww-style.pk3 - this is all from Textures definitions. I found two textures in Doom2.wad that had the colors I wanted (black and white) and then proceeded to draw the sunglasses in as small a canvas as I could without it looking too ugly. I could easily have made the graphic larger and more detailed, but I opted not to waste a lot of time - I had a concept to prove. So yeah - stylish sunglasses with no additional lumps required. Though the concept really has limited uses in more practical mods, it certainly allowed me to "bend" the rules for the mutator contest.
Hoo. I love writing these retrospectives, but they are tiring!
Download Style Mod from /idgames archive
TUTORIAL: How To Make Your First Basic Gun
PLATFORM: ZDoom 2.5.0 or later
PROGRAMS NEEDED: Slade 3.0 or later
So you want to make your first new weapon. You've probably got some amazing Grand Designs in mind, and ZDoom can probably provide everything you need to make them work - but slow down, sometimes it can be pretty tricky to figure out what you need to do. Since you're here, you probably don't have much idea what to do with a Decorate lump (and if you do, bear with me), so let's go over the absolute basics.
 First off, go get yourself a copy of SLADE 3.0. You will need it for everything related to Doom modding. You might also need to install the Visual Studio 2010 runtimes (if SLADE crashes and complains that you're missing MSVCP100.dll, you need to install them - there is a link to them on Slade's website). Go ahead and start up SLADE; you'll find yourself at the SLADE start page [see screenshot]. Click Create Zip Archive; you could easily also make a WAD, as ZDoom supports both, but PK3s are much better for organization, and it's always good to drill good working habits early on.
You should have an empty, untitled Zip archive in the window. To get started with a decorate lump, go to the menu bar and choose Archive -> New -> Entry (or the icon of the piece of paper with the E on it). SLADE will ask you what to call it; let's call it Decorate.txt (so that ZDoom knows what to do with it). Now since this "lump" (how Doom refers to individual files of data in an archive) has no actual data in it yet, SLADE will treat it as a marker. We'll need to get some text in here eventually, so click on Decorate.txt in the lump list, then in the right panel, click on "Edit as Text." SLADE's internal text editor is now open for your usage.
Our first weapon is going to be a simple automatic shotgun using built-in Doom resources, so don't worry about new graphics, sounds, or anything but code.
The basis of any Decorate code ("Actor") is the ACTOR header. This tells ZDoom what the internal name of your actor is, whether it borrows code from another actor (what's known as "inheritance"), and which ID number will refer to it (commonly called a "DoomEdNum" or Doom editor number - this is the number that editors like Doom Builder use to specify which actors will be placed in a map). For our purposes, use a header like this:
"ACTOR" must be included in the header - this tells ZDoom that this is the beginning of a new actor. SuperAutoShotgun is the name of your actor, which must be unique (in other words, it cannot be the same name as any other existing actor, or ZDoom will complain). The ": Weapon" part means that our new gun is going to inherit from the "Weapon" class, which is necessary for ZDoom to treat it as a usable weapon.
Let's go ahead and open up the actor. On the next line, place a left brace (also called a curly bracket) to "open" your block of code. It should look like this:
The next spot of code is going to define some basics about our new gun, stuff like its ammo type, how much ammo to use when firing, what message it displays upon being picked up, etc. We'll keep it simple here, borrowing some existing stuff...
It's not entirely necessary to indent your code, but it makes it look a lot cleaner and easier to read, so that for you and others it's easier to track down mistakes and such. The parameters here include Inventory.PickupMessage, which can be pretty much any message you want (you don't even need to worry about it going off the edge of the screen, as ZDoom will word-wrap it if it does); Weapon.AmmoType, which tells the game what item to use for ammo (in this case Shell, which is already defined in Doom); Weapon.AmmoUse, which tells how many Shells to take from the inventory when an attack action occurs; and Weapon.SlotNumber, which is how you assign your weapon to any of the number keys. There's a lot of parameters you can set using this kind of stuff - for a full list, check the ZDoom Wiki's list of Actor Properties.
There are also Flags that you can add and remove, which are similar to Properties, but are actually only on/off switches instead of numbers and strings. Let's throw one in there, on the next line:
That flag will prevent your weapon from waking up monsters when it fires. Okay, it doesn't make that much sense in a realistic context, but whatever. Flags, as stated above, are on/off switches for certain modes of behavior. To enable a flag, prefix it with a plus (+) symbol. If a flag is already set and you wish to remove it, prefix it with a minus (-). In this case, we've enabled the NoAlert function by adding +Weapon.NoAlert to the code. Again, you don't necessarily need to properly capitalize your code, but it's easier to read this way. For more flags you can use, check out the ZDoom Wiki's list of Actor Flags.
Properties can change a lot of stuff, but our weapon needs States to actually function. So on the very next line after the properties and flags, enter the word "States", then on the next line after that, open another sub block using a brace. The result should look a bit like this:
State blocks are the real meat of an Actor. This is where you can determine what your actor looks like, how it behaves, what it fires, how much damage it does, among many, many other things. A State block begins with the name of the state (ZDoom has a handful of built-in state names that you will need to use), then a line with the name of the sprite to use, the index letter indicating which frame of the sprite to use, the duration of that frame in "tics" (roughly one thirty-fifth of a second - Doom's internal clock runs at 35 frames per second), then any Action Functions you wish to happen at that frame. As a very basic example, let's first make our Ready state, or what happens if your gun is equipped and not doing anything. Stick this immediately after your opened States block:
A side note: for purposes of this tutorial, I'm going to be using only sprites that are contained with Doom2.wad; if you want to know how to import your own graphics for use in Doom, have a look at New Sprites and How They Work For Weapons after you're done with this tutorial.
The line "SHTG B 1 A_WeaponReady" is a complete instruction for the game engine. When ZDoom encounters this line, it will display the sprite SHTGB0, for exactly one tic, and execute the A_WeaponReady action function, which tells ZDoom to check if the player has done anything with the weapon controls such as clicked the Fire button or switched weapons. By default, A_WeaponReady also tells ZDoom to enable weapon bobbing, so the weapon does its little bouncy dance when you're running around. (In this case, we've chosen the B frame of the shotgun instead of the A frame; you'll see why later.)
A quick detour in the lesson here: Doom stores its sprites with a very specific naming structure. For example, we're using Doom's shotgun graphic, "SHTGB0". "SHTG" is the name of the sprite, and is the first thing we see in your new Ready state. Sprite names may only be four characters long; ZDoom will crash on startup if you try to use a shorter or longer name. The fifth character, the "B" in this case, is which index letter the sprite is for. Generally, a weapon will use the same name for all sprites, with an index ranging from A to Z (there are some other characters that can be used but I don't recommend it). The last character, in this case a zero, indicates which angle the graphic is intended for.
Angles are meaningless for weapon sprites, since they are literally just pasted on to the view, so weapon sprites are named with angle 0, which tells Doom that this graphic will be displayed regardless of which direction the item is facing. Angles are used for monsters, decorative items, and other things that need to actually appear to face in a direction; more information on how sprite naming works can be found at the ZDoom Wiki page on creating new sprite graphics. In summary, the graphic named "SHTGB0" refers to the sprite SHTG (sprite name), frame B, angle 0 (all angles).
So back to our new state.
You'll notice that we called this state "Ready" and made it loop. Ready is the state ZDoom goes to when a weapon is equipped and ready to fire. This is just one of four states that are required to be in your weapon for it to be functional. The other three are Select, Deselect, and Fire.
The above two states are also part of the inner workings of ZDoom, and absolutely must be present in your weapon code. (Note that there are some specific exceptions to this for more advanced techniques, like instant weapon switching, custom raise/lower animations, etc.; they go beyond the scope of this tutorial.) The Select state is what is displayed when you select your weapon. It has to have at least one A_Raise in it (which animates the weapon rising on screen and then jumps to the Ready state once it's done) and it must loop. Same with Deselect. That's almost all of your weapon's functions; now we only need a Fire state. Here, we'll see the inner workings of how Decorate handles animation.
First, add a Fire: line, similar to Select and Deselect. On the next line, we'll make this be the actual Fire action - have it use the A frame of SHTG, have it last 7 tics, and after that, we'll work a bit of magic with another Action Function, the ever-important A_FireBullets.
A_FireBullets can't be used on its own like A_Raise and A_Lower. It requires a set of six parameters, separated by commas. (As with the indents, you don't necessarily need to put spaces between the commas, but in my opinion, it makes it more readable and you'll probably be thankful you did later down the line.) The parameters for A_FireBullets are as follows:
* Horizontal accuracy, in degrees. This number determines how wide of an angle for Doom to use when randomly determining where your bullets will fly. Larger numbers mean the bullets will strike further left or right.
* Vertical accuracy, also in degrees. Similar to horizontal, this affects how high or low your bullets will hit.
* Number of bullets to fire. Since this is a shotgun, we will tell it to fire six bullets in one shot. The accuracy numbers will ensure that this turns into a nice spread of pellets.
* Damage per bullet. Doom's damage algorithm for bullets will multiply your damage by a random number from 1 to 3, so a pellet dealing 8 damage can deal either 8, 16, or 24 damage on its own. With six pellets in the shot, this shot can deal anywhere from 48 to 144 damage, but usually more towards the middle of that range, as Doom's random number generator tends to favor averages. If that sounded too complex and in-depth, a simpler explanation is that it will likely take one or two shots from this auto shotgun to kill a player at 100 health and no armor.
* Puff actor. This parameter tells ZDoom what actor to spawn if the bullet hits a wall. In this case, use BulletPuff, Doom's default smoke effect.
* Use ammo. The sixth and final parameter is what's called a "boolean", a number that can either be 1 or 0, with 1 meaning yes, and 0 meaning no. In this case, 1 means "Yes, use ammo when firing," and 0 means "No, do not use ammo when firing."
Alright. So that should do it for this line. End the Fire state with Goto Ready (this is what's called a "state jump" - these can be really useful!), and close up both of the open blocks of code using a pair of closing braces. Your block of code should look a bit like this:
Make absolutely sure you remember to close any blocks you open, or ZDoom will not know that you've finished writing your actor.
Now that we're done, click on Save Changes in the bottom right corner of the SLADE window (to save the lump you're currently working on), then click on File -> Save As from the menu bar (or the green disk icon on the toolbar), and save your archive somewhere. Call it something you'll remember later; like Tutorial-SuperAutoShotgun.pk3 (even though a pk3 is just a renamed zip, calling it a pk3 indicates to players that they should be loading it in ZDoom instead of extracting it - this will save many people a lot of confusion!). Go ahead and launch ZDoom with your file, give yourself all weapons with the IDFA cheat code, then press 3 until you've selected the shotgun that appears to be held upright. Remember how we made the ready state show sprite B instead of A? That's so we could avoid confusing our new shotgun for the original one.
Congratulations, you should now have a ridiculously powerful automatic shotgun at your disposal. Cool, eh? Well, it's not perfect; you'll notice it may be missing a few things...for example, the graphic really doesn't do anything yet, it doesn't kick back like a gun ought to, it doesn't spit fire when it shoots, and most importantly, it doesn't even have a firing sound.
The firing sound is easy to add. A_FireBullets automatically plays the defined AttackSound. AttackSound is another Actor Property, so it should go with the rest of the properties at the top of your actor with all the others. Set your attack sound to weapons/shotgf. That should look like this:
When fired, your shotgun should now play an appropriate shotgun sound. Go ahead and save the Decorate lump, save the archive (with the blue floppy disk icon, or File -> Save), and test your weapon again. When you're satisfied that it works, pop on back.
While this shotgun now at least sounds like a gun, it does still lack that ever-important fire effect, the muzzle flash. This is what ZDoom's built-in Flash state is for: when called, ZDoom overlays a muzzle flash on top of your gun and lights the room up for a small fraction of a second. To do this, go ahead and add a Flash: state to your weapon, and structure it like this:
Now let's break this down piece by piece. Flash is, of course, the name of the state; it must be called Flash, as that's where the "magic" comes from (ZDoom treats the Flash state differently from other states). In the first line, SHTF A 2, you'll see the "BRIGHT" keyword, which tells ZDoom that this frame should be displayed at full brightness, regardless of how dark the area is. A_Light2 is one of the built-in light functions; this will make the room brighten up a little bit. There are three light functions available: A_Light0, A_Light1, and A_Light2. These three functions will set the surrounding light to be brighter or darker. If you make a weapon lighten the area with A_Light2 or A_Light1, be sure to reset it to normal with A_Light0. In this case, we've created a neat little transition from light to dark by going from 2 to 1 to 0.
In the third line, you'll notice we've used the sprite TNT1A0 - this is a special sprite that displays absolutely nothing when it's used. ZDoom treats this sprite differently from other sprites; when it's told to display TNT1A0, it actually will not draw anything at all. Unlike using a blank graphic, ZDoom will not even waste the time checking over every pixel of the graphic for transparent areas; it just doesn't draw anything at all. So if you need your graphic to be invisible for any reason, use TNT1A0.
Also notice that, unlike the Fire state which ends with Goto Ready, the Flash state ends with Goto LightDone. This is because the Flash state is handled in a special way: when called, ZDoom overlays Flash's sprites over the top of the weapon graphic and runs its states separately from the weapon. The Goto LightDone command causes the Flash graphic to completely disappear, which is good because we don't want a plume of fire constantly sticking to the end of our weapon, wasting render time and potentially slowing everything down. (Incidentally, Goto LightDone seems to pretty much do the same thing as ending the Flash state in a Stop command; I'm told, however, that LightDone is probably used for a reason, and I'm not about to tempt fate any longer than I have to.)
The Flash state does not work by itself. It needs to be called using another Action Function in the Fire state: A_GunFlash. This pretty much does what it says on the tin: when called, it makes the Flash state play through its frames to the end. We need to stick it in the Fire state somewhere, but we'll need another line, since you can't have more than one action function on the same line. So here's a little coding trick: zero-duration states.
In ZDoom, if a state is told to have a duration of 0 tics, that state will happen instantly, with the game executing it and not waiting to go to the next line. To make several actions occur at once, you would use a series of states with a duration of 0. There are some pitfalls to this, though; if ZDoom encounters an endless loop consisting of nothing but zero-duration states, the game will freeze and crash. This is what is called a runaway loop; ZDoom is trying to execute all of the zero-duration states before it renders the next frame of gameplay, and if it never runs out of zero-duration states to execute, the game can never continue. The result: the game completely stops functioning.
Go ahead and add a zero-duration state to the beginning of your Fire state. It does not matter which sprite and index you use (SHTGA0 will probably work), but make its duration 0 and give it the action function A_GunFlash.
Your Fire and Flash states should now look similar to this:
Save and test your file. Cool, you made your shotgun spew flames from its barrel and make an appropriate boom noise. Now, we'll make it an item that you can pick up and we'll also give it a bit more kick.
Making your weapon into a pickup only requires that we give it an extra state (the Spawn state) and some extra actor properties to tell ZDoom what sound to play when it's picked up, and how much ammo it should include. We'll take care of the new state first. Call this state Spawn, and give it only one line: the sprite is SHOTA0, it should last -1 tics (-1 means the state will last infinitely; this requires less processing by the engine than giving it a duration of 1 and making it loop), and that's it. End the Spawn state with Stop (since the only state lasts forever, it will never reach the Stop line, but it's always good to tie up your loose ends, so add the Stop anyway).
Since it's not likely you're adding this to a map at this early stage, we'll instead make our shotgun replace an existing Doom weapon: the Chainsaw. This makes it very, very easy to test, as in Doom 2, the chainsaw is located directly next to the start of the game. Go to your ACTOR header and add "replaces Chainsaw" to the end. "Replaces" is a special keyword used in place of the editor number (which we didn't use last time) that tells ZDoom to spawn your item in place of the item you specify. In this case, ZDoom will no longer spawn Chainsaws, but instead will spawn your auto shotgun.
Your ACTOR header should look like this:
And your Spawn state should look like this:
Save and test the file (run it with Doom 2), turn left and check out the chainsaw. It should now be a shotgun. But it's not quite right: you can't select it! This is because it does not currently give you any ammo when you pick it up. If you were to find some shotgun shells elsewhere in the level, you could then select the auto shotgun, but we're an impatient bunch and we want to use it RIGHT NOW, so quit out of the game and get back to your code.
The one line we need to add is another Actor Property: Weapon.AmmoGive. For now we'll say the auto shotgun should give 16 ammo when picked up.
Save and test again. Grab the shotgun and lay waste!
Okay, so now you've got a weapon in the game that can be picked up and fired. You're all done, right? Not quite. We've still got some changes to make to give this thing a little polish, otherwise if you were to release this thing (please don't release it...), you would probably get some negative feedback, as the animation isn't very good, it's too powerful, and it eats through your entire stock of shotgun shells in about 15 seconds flat.
Firstly, let's make the fire animation a little more interesting by adding some visual kick. The gun isn't just going to stay still when it fires, so we'll make it kick backwards every time it shoots. This will be handled in your Fire state. Let's learn about the Offset keyword.
Remember the BRIGHT keyword in your Flash state? This isn't an action function, it's a "modifier" to that state that goes between the state's duration and its action. Offset works similarly, but it takes two parameters: horizontal and vertical position. Offset uses an "absolute" value; whatever parameters you feed into it will be used to tell ZDoom exactly where on screen the graphic will go.
For purposes of this exercise, reduce the duration on your A_FireBullets state from 7 to 1. We'll take up the other six tics with a simple little animation.
Offsets can be defined once per state, so we'll need to add a few extra lines to the Fire state to pull this off. All of these lines will be SHTGA0, will last 1 tic each, and will each have a unique Offset line.
It should be noted that the "default" values for Offset are 0, 32. Using 0 on either parameter tells ZDoom to keep the previous offset; by default, the weapon stays centered vertically, and 32 pixels up the screen. For the first parameter (the X axis), increasing it will shift the weapon to the right, while decreasing it shifts the weapon to the left (use negative values like -10 to shift it further left). For the second parameter, increasing will shift it down, while decreasing it shifts it up. To restate, your weapon will start off at position 0, 32.
Apply your Offset keywords like so:
Your Fire state will probably look something like this when you're done:
There's a subtle bit of simple math going on with how I organized these offsets. If you were to watch a video of a shotgun being fired in slow motion, you will probably notice how when the shot is fired, the weapon suddenly lurches backwards, then slowly reverses direction and moves forward again. To replicate this effect, we use large offsets (moving the weapon down 8 pixels per tic, twice), then on the way back up, we use smaller ones (raising the weapon back up 4 pixels, then another 4, then 3, then 2). Don't worry if you didn't understand much of that; it may take some trials, errors, and experimentation to really get a feel for what works and what doesn't.
Save and test your file again, then let loose with your gun. That thing's bucking like a mad bull!
And yet, as awesome as this gun is, it's still unfairly powerful; you could probably take down a Baron of Hell in a few seconds with this, considering it's doing roughly 100 damage per shot, and firing five shots per second. We need to make these numbers just a bit less ridiculous, so it's time to introduce gameplay balance.
The first thing we can do is reduce how fast the weapon fires. Now, there's not a concrete "fire rate" parameter we can set; your weapon's rate of fire is entirely based on the length of its Fire state in tics. You can gauge your weapon's rate of fire by calculating how many tics are in your Fire state, then dividing 35 by that number. In this case, 35 tics per second divided by 7 tics per shot equals 5 shots per second - that's a bit ridiculous for a shotgun (okay, so some real-world shotguns can achieve that rate of fire, but bear with me, we're trying to make it so Hell's minions can stand some semblance of a fighting chance!).
You can slow down the fire state a little by adding a couple more tics. Stick a single line at the end of the Fire state, with the frame SHTGA0, lasting 4 tics. That'll slow it a bit, but it's also doing a bit too much damage. Try messing with the number of pellets and the amount of damage per pellet in your Fire state (for a weapon replacing the Chainsaw, probably 8 pellets for 4 damage each). That'll make it a little more normal, and it will probably take a couple shots to take down a Pinky Demon. Lastly, go ahead and get rid of +Weapon.NoAlert, so that you can't sneak around levels with a loud gun anymore (which, admittedly, was a bit silly, but heck, it's a good way to learn about how flags work).
To sum up, your Decorate lump should look a bit like this:
Go ahead and test your file one last time. Play through a few levels with it, see what it's like. Now that it's a little less unfair, the weapon should be pretty much complete. Congratulations, you are now an Amateur Gunsmith.
PROGRAMS NEEDED: Slade 3.0 or later
So you want to make your first new weapon. You've probably got some amazing Grand Designs in mind, and ZDoom can probably provide everything you need to make them work - but slow down, sometimes it can be pretty tricky to figure out what you need to do. Since you're here, you probably don't have much idea what to do with a Decorate lump (and if you do, bear with me), so let's go over the absolute basics.
 First off, go get yourself a copy of SLADE 3.0. You will need it for everything related to Doom modding. You might also need to install the Visual Studio 2010 runtimes (if SLADE crashes and complains that you're missing MSVCP100.dll, you need to install them - there is a link to them on Slade's website). Go ahead and start up SLADE; you'll find yourself at the SLADE start page [see screenshot]. Click Create Zip Archive; you could easily also make a WAD, as ZDoom supports both, but PK3s are much better for organization, and it's always good to drill good working habits early on.
You should have an empty, untitled Zip archive in the window. To get started with a decorate lump, go to the menu bar and choose Archive -> New -> Entry (or the icon of the piece of paper with the E on it). SLADE will ask you what to call it; let's call it Decorate.txt (so that ZDoom knows what to do with it). Now since this "lump" (how Doom refers to individual files of data in an archive) has no actual data in it yet, SLADE will treat it as a marker. We'll need to get some text in here eventually, so click on Decorate.txt in the lump list, then in the right panel, click on "Edit as Text." SLADE's internal text editor is now open for your usage.
Our first weapon is going to be a simple automatic shotgun using built-in Doom resources, so don't worry about new graphics, sounds, or anything but code.
The basis of any Decorate code ("Actor") is the ACTOR header. This tells ZDoom what the internal name of your actor is, whether it borrows code from another actor (what's known as "inheritance"), and which ID number will refer to it (commonly called a "DoomEdNum" or Doom editor number - this is the number that editors like Doom Builder use to specify which actors will be placed in a map). For our purposes, use a header like this:
ACTOR SuperAutoShotgun : Weapon
"ACTOR" must be included in the header - this tells ZDoom that this is the beginning of a new actor. SuperAutoShotgun is the name of your actor, which must be unique (in other words, it cannot be the same name as any other existing actor, or ZDoom will complain). The ": Weapon" part means that our new gun is going to inherit from the "Weapon" class, which is necessary for ZDoom to treat it as a usable weapon.
Let's go ahead and open up the actor. On the next line, place a left brace (also called a curly bracket) to "open" your block of code. It should look like this:
ACTOR SuperAutoShotgun : Weapon

{
The next spot of code is going to define some basics about our new gun, stuff like its ammo type, how much ammo to use when firing, what message it displays upon being picked up, etc. We'll keep it simple here, borrowing some existing stuff...
ACTOR SuperAutoShotgun : Weapon

{

Inventory.PickupMessage "You got the Auto Shotgun! Boom, boom, boom."

Weapon.AmmoType "Shell"

Weapon.AmmoUse 1

Weapon.SlotNumber 3
It's not entirely necessary to indent your code, but it makes it look a lot cleaner and easier to read, so that for you and others it's easier to track down mistakes and such. The parameters here include Inventory.PickupMessage, which can be pretty much any message you want (you don't even need to worry about it going off the edge of the screen, as ZDoom will word-wrap it if it does); Weapon.AmmoType, which tells the game what item to use for ammo (in this case Shell, which is already defined in Doom); Weapon.AmmoUse, which tells how many Shells to take from the inventory when an attack action occurs; and Weapon.SlotNumber, which is how you assign your weapon to any of the number keys. There's a lot of parameters you can set using this kind of stuff - for a full list, check the ZDoom Wiki's list of Actor Properties.
There are also Flags that you can add and remove, which are similar to Properties, but are actually only on/off switches instead of numbers and strings. Let's throw one in there, on the next line:
+Weapon.NoAlert
That flag will prevent your weapon from waking up monsters when it fires. Okay, it doesn't make that much sense in a realistic context, but whatever. Flags, as stated above, are on/off switches for certain modes of behavior. To enable a flag, prefix it with a plus (+) symbol. If a flag is already set and you wish to remove it, prefix it with a minus (-). In this case, we've enabled the NoAlert function by adding +Weapon.NoAlert to the code. Again, you don't necessarily need to properly capitalize your code, but it's easier to read this way. For more flags you can use, check out the ZDoom Wiki's list of Actor Flags.
Properties can change a lot of stuff, but our weapon needs States to actually function. So on the very next line after the properties and flags, enter the word "States", then on the next line after that, open another sub block using a brace. The result should look a bit like this:
ACTOR SuperAutoShotgun : Weapon

{

Inventory.PickupMessage "You got the Auto Shotgun! Boom, boom, boom."

Weapon.AmmoType "Shell"

Weapon.AmmoUse 1

+Weapon.NoAlert

Weapon.SlotNumber 3

States

{
State blocks are the real meat of an Actor. This is where you can determine what your actor looks like, how it behaves, what it fires, how much damage it does, among many, many other things. A State block begins with the name of the state (ZDoom has a handful of built-in state names that you will need to use), then a line with the name of the sprite to use, the index letter indicating which frame of the sprite to use, the duration of that frame in "tics" (roughly one thirty-fifth of a second - Doom's internal clock runs at 35 frames per second), then any Action Functions you wish to happen at that frame. As a very basic example, let's first make our Ready state, or what happens if your gun is equipped and not doing anything. Stick this immediately after your opened States block:
Ready:

SHTG B 1 A_WeaponReady

Loop
A side note: for purposes of this tutorial, I'm going to be using only sprites that are contained with Doom2.wad; if you want to know how to import your own graphics for use in Doom, have a look at New Sprites and How They Work For Weapons after you're done with this tutorial.
The line "SHTG B 1 A_WeaponReady" is a complete instruction for the game engine. When ZDoom encounters this line, it will display the sprite SHTGB0, for exactly one tic, and execute the A_WeaponReady action function, which tells ZDoom to check if the player has done anything with the weapon controls such as clicked the Fire button or switched weapons. By default, A_WeaponReady also tells ZDoom to enable weapon bobbing, so the weapon does its little bouncy dance when you're running around. (In this case, we've chosen the B frame of the shotgun instead of the A frame; you'll see why later.)
A quick detour in the lesson here: Doom stores its sprites with a very specific naming structure. For example, we're using Doom's shotgun graphic, "SHTGB0". "SHTG" is the name of the sprite, and is the first thing we see in your new Ready state. Sprite names may only be four characters long; ZDoom will crash on startup if you try to use a shorter or longer name. The fifth character, the "B" in this case, is which index letter the sprite is for. Generally, a weapon will use the same name for all sprites, with an index ranging from A to Z (there are some other characters that can be used but I don't recommend it). The last character, in this case a zero, indicates which angle the graphic is intended for.
Angles are meaningless for weapon sprites, since they are literally just pasted on to the view, so weapon sprites are named with angle 0, which tells Doom that this graphic will be displayed regardless of which direction the item is facing. Angles are used for monsters, decorative items, and other things that need to actually appear to face in a direction; more information on how sprite naming works can be found at the ZDoom Wiki page on creating new sprite graphics. In summary, the graphic named "SHTGB0" refers to the sprite SHTG (sprite name), frame B, angle 0 (all angles).
So back to our new state.
You'll notice that we called this state "Ready" and made it loop. Ready is the state ZDoom goes to when a weapon is equipped and ready to fire. This is just one of four states that are required to be in your weapon for it to be functional. The other three are Select, Deselect, and Fire.
Select:

SHTG A 1 A_Raise

Loop

Deselect:

SHTG A 1 A_Lower

Loop
The above two states are also part of the inner workings of ZDoom, and absolutely must be present in your weapon code. (Note that there are some specific exceptions to this for more advanced techniques, like instant weapon switching, custom raise/lower animations, etc.; they go beyond the scope of this tutorial.) The Select state is what is displayed when you select your weapon. It has to have at least one A_Raise in it (which animates the weapon rising on screen and then jumps to the Ready state once it's done) and it must loop. Same with Deselect. That's almost all of your weapon's functions; now we only need a Fire state. Here, we'll see the inner workings of how Decorate handles animation.
First, add a Fire: line, similar to Select and Deselect. On the next line, we'll make this be the actual Fire action - have it use the A frame of SHTG, have it last 7 tics, and after that, we'll work a bit of magic with another Action Function, the ever-important A_FireBullets.
SHTG A 7 A_FireBullets(5.5, 3, 6, 8, "BulletPuff", 1)
A_FireBullets can't be used on its own like A_Raise and A_Lower. It requires a set of six parameters, separated by commas. (As with the indents, you don't necessarily need to put spaces between the commas, but in my opinion, it makes it more readable and you'll probably be thankful you did later down the line.) The parameters for A_FireBullets are as follows:
* Horizontal accuracy, in degrees. This number determines how wide of an angle for Doom to use when randomly determining where your bullets will fly. Larger numbers mean the bullets will strike further left or right.
* Vertical accuracy, also in degrees. Similar to horizontal, this affects how high or low your bullets will hit.
* Number of bullets to fire. Since this is a shotgun, we will tell it to fire six bullets in one shot. The accuracy numbers will ensure that this turns into a nice spread of pellets.
* Damage per bullet. Doom's damage algorithm for bullets will multiply your damage by a random number from 1 to 3, so a pellet dealing 8 damage can deal either 8, 16, or 24 damage on its own. With six pellets in the shot, this shot can deal anywhere from 48 to 144 damage, but usually more towards the middle of that range, as Doom's random number generator tends to favor averages. If that sounded too complex and in-depth, a simpler explanation is that it will likely take one or two shots from this auto shotgun to kill a player at 100 health and no armor.
* Puff actor. This parameter tells ZDoom what actor to spawn if the bullet hits a wall. In this case, use BulletPuff, Doom's default smoke effect.
* Use ammo. The sixth and final parameter is what's called a "boolean", a number that can either be 1 or 0, with 1 meaning yes, and 0 meaning no. In this case, 1 means "Yes, use ammo when firing," and 0 means "No, do not use ammo when firing."
Alright. So that should do it for this line. End the Fire state with Goto Ready (this is what's called a "state jump" - these can be really useful!), and close up both of the open blocks of code using a pair of closing braces. Your block of code should look a bit like this:
ACTOR SuperAutoShotgun : Weapon

{

Inventory.PickupMessage "You got the Auto Shotgun! Boom, boom, boom."

Weapon.AmmoType "Shell"

Weapon.AmmoUse 1

+Weapon.NoAlert

Weapon.SlotNumber 3

States

{

Ready:

SHTG B 1 A_WeaponReady

Loop

Select:

SHTG A 1 A_Raise

Loop

Deselect:

SHTG A 1 A_Lower

Loop

Fire:

SHTG A 7 A_FireBullets(5.5, 3, 6, 8, "BulletPuff", 1)

Goto Ready

}

}
Make absolutely sure you remember to close any blocks you open, or ZDoom will not know that you've finished writing your actor.
Now that we're done, click on Save Changes in the bottom right corner of the SLADE window (to save the lump you're currently working on), then click on File -> Save As from the menu bar (or the green disk icon on the toolbar), and save your archive somewhere. Call it something you'll remember later; like Tutorial-SuperAutoShotgun.pk3 (even though a pk3 is just a renamed zip, calling it a pk3 indicates to players that they should be loading it in ZDoom instead of extracting it - this will save many people a lot of confusion!). Go ahead and launch ZDoom with your file, give yourself all weapons with the IDFA cheat code, then press 3 until you've selected the shotgun that appears to be held upright. Remember how we made the ready state show sprite B instead of A? That's so we could avoid confusing our new shotgun for the original one.
Congratulations, you should now have a ridiculously powerful automatic shotgun at your disposal. Cool, eh? Well, it's not perfect; you'll notice it may be missing a few things...for example, the graphic really doesn't do anything yet, it doesn't kick back like a gun ought to, it doesn't spit fire when it shoots, and most importantly, it doesn't even have a firing sound.
The firing sound is easy to add. A_FireBullets automatically plays the defined AttackSound. AttackSound is another Actor Property, so it should go with the rest of the properties at the top of your actor with all the others. Set your attack sound to weapons/shotgf. That should look like this:
AttackSound "weapons/shotgf"
When fired, your shotgun should now play an appropriate shotgun sound. Go ahead and save the Decorate lump, save the archive (with the blue floppy disk icon, or File -> Save), and test your weapon again. When you're satisfied that it works, pop on back.
While this shotgun now at least sounds like a gun, it does still lack that ever-important fire effect, the muzzle flash. This is what ZDoom's built-in Flash state is for: when called, ZDoom overlays a muzzle flash on top of your gun and lights the room up for a small fraction of a second. To do this, go ahead and add a Flash: state to your weapon, and structure it like this:
Flash:

SHTF A 2 BRIGHT A_Light2

SHTF B 2 BRIGHT A_Light1

TNT1 A 1 A_Light0

Goto LightDone
Now let's break this down piece by piece. Flash is, of course, the name of the state; it must be called Flash, as that's where the "magic" comes from (ZDoom treats the Flash state differently from other states). In the first line, SHTF A 2, you'll see the "BRIGHT" keyword, which tells ZDoom that this frame should be displayed at full brightness, regardless of how dark the area is. A_Light2 is one of the built-in light functions; this will make the room brighten up a little bit. There are three light functions available: A_Light0, A_Light1, and A_Light2. These three functions will set the surrounding light to be brighter or darker. If you make a weapon lighten the area with A_Light2 or A_Light1, be sure to reset it to normal with A_Light0. In this case, we've created a neat little transition from light to dark by going from 2 to 1 to 0.
In the third line, you'll notice we've used the sprite TNT1A0 - this is a special sprite that displays absolutely nothing when it's used. ZDoom treats this sprite differently from other sprites; when it's told to display TNT1A0, it actually will not draw anything at all. Unlike using a blank graphic, ZDoom will not even waste the time checking over every pixel of the graphic for transparent areas; it just doesn't draw anything at all. So if you need your graphic to be invisible for any reason, use TNT1A0.
Also notice that, unlike the Fire state which ends with Goto Ready, the Flash state ends with Goto LightDone. This is because the Flash state is handled in a special way: when called, ZDoom overlays Flash's sprites over the top of the weapon graphic and runs its states separately from the weapon. The Goto LightDone command causes the Flash graphic to completely disappear, which is good because we don't want a plume of fire constantly sticking to the end of our weapon, wasting render time and potentially slowing everything down. (Incidentally, Goto LightDone seems to pretty much do the same thing as ending the Flash state in a Stop command; I'm told, however, that LightDone is probably used for a reason, and I'm not about to tempt fate any longer than I have to.)
The Flash state does not work by itself. It needs to be called using another Action Function in the Fire state: A_GunFlash. This pretty much does what it says on the tin: when called, it makes the Flash state play through its frames to the end. We need to stick it in the Fire state somewhere, but we'll need another line, since you can't have more than one action function on the same line. So here's a little coding trick: zero-duration states.
In ZDoom, if a state is told to have a duration of 0 tics, that state will happen instantly, with the game executing it and not waiting to go to the next line. To make several actions occur at once, you would use a series of states with a duration of 0. There are some pitfalls to this, though; if ZDoom encounters an endless loop consisting of nothing but zero-duration states, the game will freeze and crash. This is what is called a runaway loop; ZDoom is trying to execute all of the zero-duration states before it renders the next frame of gameplay, and if it never runs out of zero-duration states to execute, the game can never continue. The result: the game completely stops functioning.
Go ahead and add a zero-duration state to the beginning of your Fire state. It does not matter which sprite and index you use (SHTGA0 will probably work), but make its duration 0 and give it the action function A_GunFlash.
Your Fire and Flash states should now look similar to this:
Fire:

SHTG A 0 A_GunFlash

SHTG A 7 A_FireBullets(5.5, 3, 6, 8, "BulletPuff", 1)

Goto Ready

Flash:

SHTF A 2 BRIGHT A_Light2

SHTF B 2 BRIGHT A_Light1

TNT1 A 1 A_Light0

Goto LightDone
Save and test your file. Cool, you made your shotgun spew flames from its barrel and make an appropriate boom noise. Now, we'll make it an item that you can pick up and we'll also give it a bit more kick.
Making your weapon into a pickup only requires that we give it an extra state (the Spawn state) and some extra actor properties to tell ZDoom what sound to play when it's picked up, and how much ammo it should include. We'll take care of the new state first. Call this state Spawn, and give it only one line: the sprite is SHOTA0, it should last -1 tics (-1 means the state will last infinitely; this requires less processing by the engine than giving it a duration of 1 and making it loop), and that's it. End the Spawn state with Stop (since the only state lasts forever, it will never reach the Stop line, but it's always good to tie up your loose ends, so add the Stop anyway).
Since it's not likely you're adding this to a map at this early stage, we'll instead make our shotgun replace an existing Doom weapon: the Chainsaw. This makes it very, very easy to test, as in Doom 2, the chainsaw is located directly next to the start of the game. Go to your ACTOR header and add "replaces Chainsaw" to the end. "Replaces" is a special keyword used in place of the editor number (which we didn't use last time) that tells ZDoom to spawn your item in place of the item you specify. In this case, ZDoom will no longer spawn Chainsaws, but instead will spawn your auto shotgun.
Your ACTOR header should look like this:
ACTOR SuperAutoShotgun : Weapon replaces Chainsaw
And your Spawn state should look like this:
Spawn:

SHOT A -1

Stop
Save and test the file (run it with Doom 2), turn left and check out the chainsaw. It should now be a shotgun. But it's not quite right: you can't select it! This is because it does not currently give you any ammo when you pick it up. If you were to find some shotgun shells elsewhere in the level, you could then select the auto shotgun, but we're an impatient bunch and we want to use it RIGHT NOW, so quit out of the game and get back to your code.
The one line we need to add is another Actor Property: Weapon.AmmoGive. For now we'll say the auto shotgun should give 16 ammo when picked up.
Weapon.AmmoGive 16
Save and test again. Grab the shotgun and lay waste!
Okay, so now you've got a weapon in the game that can be picked up and fired. You're all done, right? Not quite. We've still got some changes to make to give this thing a little polish, otherwise if you were to release this thing (please don't release it...), you would probably get some negative feedback, as the animation isn't very good, it's too powerful, and it eats through your entire stock of shotgun shells in about 15 seconds flat.
Firstly, let's make the fire animation a little more interesting by adding some visual kick. The gun isn't just going to stay still when it fires, so we'll make it kick backwards every time it shoots. This will be handled in your Fire state. Let's learn about the Offset keyword.
Remember the BRIGHT keyword in your Flash state? This isn't an action function, it's a "modifier" to that state that goes between the state's duration and its action. Offset works similarly, but it takes two parameters: horizontal and vertical position. Offset uses an "absolute" value; whatever parameters you feed into it will be used to tell ZDoom exactly where on screen the graphic will go.
For purposes of this exercise, reduce the duration on your A_FireBullets state from 7 to 1. We'll take up the other six tics with a simple little animation.
Offsets can be defined once per state, so we'll need to add a few extra lines to the Fire state to pull this off. All of these lines will be SHTGA0, will last 1 tic each, and will each have a unique Offset line.
It should be noted that the "default" values for Offset are 0, 32. Using 0 on either parameter tells ZDoom to keep the previous offset; by default, the weapon stays centered vertically, and 32 pixels up the screen. For the first parameter (the X axis), increasing it will shift the weapon to the right, while decreasing it shifts the weapon to the left (use negative values like -10 to shift it further left). For the second parameter, increasing will shift it down, while decreasing it shifts it up. To restate, your weapon will start off at position 0, 32.
Apply your Offset keywords like so:
SHTG A 1 Offset(0,44)
Your Fire state will probably look something like this when you're done:
Fire:

SHTG A 0 A_GunFlash

SHTG A 1 A_FireBullets(5.5, 3, 6, 8, "BulletPuff", 1)

SHTG A 1 Offset(0,40)

SHTG A 1 Offset(0,48)

SHTG A 1 Offset(0,44)

SHTG A 1 Offset(0,40)

SHTG A 1 Offset(0,37)

SHTG A 1 Offset(0,35)

Goto Ready
There's a subtle bit of simple math going on with how I organized these offsets. If you were to watch a video of a shotgun being fired in slow motion, you will probably notice how when the shot is fired, the weapon suddenly lurches backwards, then slowly reverses direction and moves forward again. To replicate this effect, we use large offsets (moving the weapon down 8 pixels per tic, twice), then on the way back up, we use smaller ones (raising the weapon back up 4 pixels, then another 4, then 3, then 2). Don't worry if you didn't understand much of that; it may take some trials, errors, and experimentation to really get a feel for what works and what doesn't.
Save and test your file again, then let loose with your gun. That thing's bucking like a mad bull!
And yet, as awesome as this gun is, it's still unfairly powerful; you could probably take down a Baron of Hell in a few seconds with this, considering it's doing roughly 100 damage per shot, and firing five shots per second. We need to make these numbers just a bit less ridiculous, so it's time to introduce gameplay balance.
The first thing we can do is reduce how fast the weapon fires. Now, there's not a concrete "fire rate" parameter we can set; your weapon's rate of fire is entirely based on the length of its Fire state in tics. You can gauge your weapon's rate of fire by calculating how many tics are in your Fire state, then dividing 35 by that number. In this case, 35 tics per second divided by 7 tics per shot equals 5 shots per second - that's a bit ridiculous for a shotgun (okay, so some real-world shotguns can achieve that rate of fire, but bear with me, we're trying to make it so Hell's minions can stand some semblance of a fighting chance!).
You can slow down the fire state a little by adding a couple more tics. Stick a single line at the end of the Fire state, with the frame SHTGA0, lasting 4 tics. That'll slow it a bit, but it's also doing a bit too much damage. Try messing with the number of pellets and the amount of damage per pellet in your Fire state (for a weapon replacing the Chainsaw, probably 8 pellets for 4 damage each). That'll make it a little more normal, and it will probably take a couple shots to take down a Pinky Demon. Lastly, go ahead and get rid of +Weapon.NoAlert, so that you can't sneak around levels with a loud gun anymore (which, admittedly, was a bit silly, but heck, it's a good way to learn about how flags work).
To sum up, your Decorate lump should look a bit like this:
ACTOR SuperAutoShotgun : Weapon replaces Chainsaw

{

Inventory.PickupMessage "You got the Auto Shotgun! Boom, boom, boom."

Weapon.AmmoType "Shell"

Weapon.AmmoUse 1

Weapon.AmmoGive 16

Weapon.SlotNumber 3

AttackSound "weapons/shotgf"

States

{

Spawn:

SHOT A -1

Stop

Ready:

SHTG B 1 A_WeaponReady

Loop

Select:

SHTG A 1 A_Raise

Loop

Deselect:

SHTG A 1 A_Lower

Loop

Fire:

SHTG A 0 A_GunFlash

SHTG A 1 A_FireBullets(5.5, 3, 8, 4, "BulletPuff", 1)

SHTG A 1 Offset(0,40)

SHTG A 1 Offset(0,48)

SHTG A 1 Offset(0,44)

SHTG A 1 Offset(0,40)

SHTG A 1 Offset(0,37)

SHTG A 1 Offset(0,35)

SHTG A 3

Goto Ready

Flash:

SHTF A 2 BRIGHT A_Light2

SHTF B 2 BRIGHT A_Light1

TNT1 A 1 A_Light0

Goto LightDone

}

}
Go ahead and test your file one last time. Play through a few levels with it, see what it's like. Now that it's a little less unfair, the weapon should be pretty much complete. Congratulations, you are now an Amateur Gunsmith.
Weasel's Mods
When finished, these links will go to retrospective articles instead of direct links to the idgames database.
Mods That Have Retrospectives:
Style Mod (ZDoom SVN R2309) - A "mutator" for CutmanMike's mutator contest; all weapons have infinite ammo but alt-fires cost Style Points, which all enemies drop. Retrospective added 1/10/2011
Diaz: The Last Hours of Purity (original release) (ZDoom 2.1.6) - More realistic guns, based on characters by Marty Kirra. Retrospective added 6/21/2012
Mods That Do Not Have Retrospectives:
No Shotguns For You! (GZDoom 3.1.0) - An experiment in which every shotgun is removed from Doom, and all shotgun-related things are replaced with bullet weapons instead.
Cola 3 (GZDoom 3.x) - I steal a few pages from Cave Story. This mod isn't finished yet.
Mixed Tape #3 (ZDoom, 2016) - A mash-up of guns from mods I never finished.
WW-DRLA Sounds (ZDoom 2.8.1) - A sound effects patch for Yholl's Doom Roguelike Arsenal.
Accessories to Murder (ww-doomnukem) (GZDoom, 2016) - Doom Nukem's spritework needed a better home than a Brutal Doom add-on. So I made this with it.
Cold Hard Cash 2 (ZDoom, 2015) - Sequel to the EDGE mod. Not really finished.
Build Your Skill (ZDoom, 2014) - An experiment in which your character really, really sucks at being an action hero, but slowly gets better at it. Wasn't quite finished. Could probably use a rewrite.
Weasel Presents: NAZIS V2 (ZDoom SVN R3615) - A much less sucky version of the below, with more not-German weapons included. Not quite finished. In a bit of a state of flux.
Weasel Presents: NAZIS! - (ZDoom SVN R3212) - Starring one of the few remaining acceptable targets.
Style Mod for Heretic - (ZDoom, 2011) - I take the mutator approach to Heretic. What erupts is chaos. Mostly finished but there are some features missing that I've forgotten by now. Has a staff that launches homing chickens.
Strife Needs A God Damn Mod (ZDoom, 2010) - A mod for Strife. Very unfinished. Has a shotgun in it.
Agent Hernandez (ZDoom, 2009) - Unfinished sequel to Diaz. Was never quite satisfied with it.
No Rockets For You (Boom) - My only map.
Diaz: The Last Hours of Purity (WW Hits Collection) (GZDoom SVN R183) - I wasn't satisfied with the original Diaz so I made it suck less.
ww-buttonmash (ZDoom, 2012) - Get stronger by hammering the fire button really fast. Dumb, unfinished, and possibly a carpal-tunnel hazard.
The Adventures of Mister Cola (GZDoom 1.0.10) - Powerful weapons with an overpowered, caffeinated twist.
Mini-Mods Collection (EDGE 1.29) - A selection of single-weapon replacements that can be combined together.
The Stranger (GZDoom 0.9.21) - Anime-inspired weapons; the first part of the "Weaselverse."
Mixed Tape #2 (GZDoom) - A mash-up of my older guns.
Mixed Tape #1 (GZDoom) - A mash-up of my much older guns.
GZMecha (GZDoom) - A very old attempt at making something MechWarrior-flavored. Not quite finished, but also very old and held together by duct tape.
Batteries Still Not Included (ZDoom 2.0.96x) - Another arsenal of nothing but energy weapons.
Doom Illustrated (ZDoom version) (ZDoom 2.0.96x) - I make a selection of comic book inspired weapons...again.
Cold Hard Cash (EDGE 1.29) - No weapon pickups; all weapons must be bought using money beaten out of monsters.
Doom Illustrated (EDGE version) (EDGE 1.29) - I make a selection of comic book inspired weapons. Features Forsaken's PHIL-3.
Batteries Not Included (EDGE 1.27) - An entire arsenal of energy weapons.
Operation Mjolnir (EDGE 1.27) - Remake of Operation Silver Hammer. Wherein Weasel steals all the weapon graphics from NAM and makes it suck less.
Operation Silver Hammer (EDGE 1.27) - Wherein Weasel steals all the weapon graphics from NAM.
Extreme Measures (ZDoom 2.0.63a) - My first mod combining DeHackEd and Decorate monsters. Slightly cool.
Doom Operational Support (ZDoom 2.0.60) - A "remake" of Doom Aesthetics Mod with slightly better resources and DeHackEd work.
Kroz Skin (Legacy-compatible skin) - The player character from ZZT as a Doom skin. I thought about updating this for Skulltag, but...eh.
Film Noir (any) - A simple patch that changes Doom's palette to greyscale.
Independence Doom (Boom-compatible) - A DeHackEd-only (with Decaldef support for ZDoom) patch that makes everything turn into rocket explosions.
Doom Aesthetics Mod (ZDoom 1.23) - My first ZDoom-based mod, featuring many Scuba Steve rips and DeHackEd-based idiocy.
Weasel's Weapons (EDGE 1.27) - A piece of history: my very first weapon mod.
Tutorials
You will learn.
How To Make Your First Basic Gun - For ZDoom. Learn the absolute basics of using the SLADE lump editor, and the structure and usage of DECORATE lumps, and how both apply to making a kick-ass auto shotgun.
New Sprites and How They Work For Guns - How to properly save and import PNG graphics, how to align weapon sprites, and how it all rolls together.
Adding Your Own Sound Effects - How to import your own sound effects, and how SNDINFO works.
Altfires, Projectiles, and Accuracy - How to make flying rockets, machine guns, and weapons with multiple firing modes.
Inheritance and Other Time Savers - Learn how to save yourself the tedium by inheriting from other actors to copy code, and how to turn ten lines of identical states into just one.
Inventory "Variables" and Making a Sniper Rifle - Learn how to make your weapon keep track of its status through inventory items, and apply this knowledge to make a sniper rifle that zooms in and out.
New Ammo Types and Weapons That Reload - NEW! 6/28/2012 - Learn how to make your weapons reload using ZDoom's new reload key. Also, how to define new ammo types, and how to use the "old" reload method (for Zandronum).
How to Make Your Weapons Fun to Use - Some tips and guidelines for things like making better weapon animations, choosing your resources, and generally making every weapon fun.
Making Your Project Less of a Pain to Download and Run - Some guidelines that will go a long way toward making sure everybody can enjoy your mod without too much hassle.
An Explanation of the Half-Tic Trick - How I managed to apply a more precise rate of fire on the Uzi in ww-terror.
Articles
When this is finished, it will contain a list of Articles such as case-studies on existing mods or games, interviews with artists, and possibly any other things of interest.
The State of Gameplay Mods - I wax nostalgic and rant on about mods that have too many guns.
The State of Gameplay Mods - I wax nostalgic and rant on about mods that have too many guns.
Main
It's been a while, my friends, and the Doom Armory is unfortunately no more. Well, I've decided to rethink the reason why I started the Armory - initially, I was only really interested in trying mods other people have made, and providing an alternative source of reviews from the (previously more restrictive) /newstuff Chronicles columns at Doomworld. I don't feel that I need to drum up interest in weapon mods anymore - that may be the problem with many mods these days. More people want to make gun patches, and more people decide it's easier to take screenshots from their favorite game or partake of the many pre-made resources to mix-and-match their own arsenal. It doesn't always go well.
So that's why the new Armory - which, by suggestion of Xaser, I've christened "GunLabs" - will focus on tutorials and case-studies, articles, and other things that will help budding gunsmiths learn what works and what doesn't. Of course, it'll also be a place for me to wax nostalgic on older stuff, whether it be a past classic like Immoral Conduct, or even one of my own old mods. It's time to show that making weapon mods isn't the last refuge of a man too lazy to learn to draw or map. And I intend to show this by educating the gun-making masses that their jagged, washed-out Call of Duty rips and huge amalgamations of free weapon resources can be made much, much better.
Welcome to GunLabs. I hope this will help you learn something.
Subscribe to:
Posts (Atom)